Pages

Friday, July 18, 2014

Ada's Room: Project 2: String Elephant

After llama-ing it up, my next animal of choice was the elephant.  I've seen a lot of string art floating around the internet lately, and thought an elephant would be fun to do.

The String Elephant

Things You'll Need/Total Cost:
Cardstock - $0
Wood - $7.50, I purchased 1/2" x 2' x 4' birch wood which is enough for the two projects, so I split the cost.
Sandpaper - $0
Stain - $7.80
Paint Brush and Clean Towel (for stain) - $0
11/16" Nails (2 packs) - $2.60
Embroidery Floss - $4
Total Cost: $21.90

Step 1:  Draw/cut a stencil. Finding an elephant silhouette was very easy.  I drew my elephant on extra cardstock I had in the house and cut it out for a sturdy stencil.


Step 2: Cut the wood to the size you need and sand the side and edges that will be stained.  My board was 24" x 17.5", which allowed for roughly 1-2" around my elephant on all sides.

Step 3: Stain or paint the wood.  I selected red mahogany stain because I wanted a darker color that would come close to matching the pig.  You can also add a polyurethane layer to make it shiny, but I preferred how the wood looked with just the stain.


Step 4:  This step is probably not necessary depending on how you want to do your elephant.  With a pencil, I traced my stencil onto the stained wood.  I originally planned to paint the inside of my elephant a dark color to really contrast the bright string but my stain ended up being dark enough.  I didn't change my mind about the painting until I had already drawn the elephant, which added a few steps for me.  If you aren't planning to paint, I don't recommend tracing your stencil.  Instead, mark on the stencil where you want your nails to go and use this guideline when you start nailing.  You could either nail around your stencil or mark the wood where the holes should go.

Step 5: If you traced your stencil onto the board, mark and/or tap where you want your nails (I spaced mine roughly 3/4" apart).  Then, go back and erase the pencil marks on the wood.  Be sure to erase with the grain to avoid messing up the look of the stain or paint.  Once all pencil marks are gone, add the nails to make the outline of your elephant.


A few tips for this portion:
  • You could skip marking where you want the nails, but I wanted mine to be as uniformly spaced as possible.  
  • Birch is a hard wood.  Consider purchasing something softer.  I had 156 nails and my hand (and thumb) was pretty sore by the end of it.  Watching Argentina lose probably didn't help...
  • I'm not one to talk, but don't get too frustrated if your nails don't go in perfectly straight.  I took longer than I probably should have to do the outline because I was so obsessed with wanting it to be perfect.  You won't notice a few angled nails once the string is on there.
  • Pay attention to the nails you are using.  I tried to toss any nails where the head of the nail wasn't completely flat (some of them had snagged edges), but when I added the string it was obvious that I missed some.  The string got caught on rough edges and would start to fray when I wasn't careful.
  • If there is a fly that keeps landing on your foot during this process, don't use the hammer to kill it.  You will hurt yourself.  Just ask Micah to kung foo it out of the room for you.
Step 6: Add the string.  The greatest part about this step is you can experiment and just undo it if you don't like it.  I chose to make mine different colors and found that overlapping the previous color with the next made for the smoothest transition.


This project was easy and turned out well enough that there is a strong chance that I will do another one like it.  I will probably make the next project smaller so it requires fewer nails, though.

Ada's Room: Project 1: The Quilted Llama

Ada Renee is due on November 25, 2014 and I am in full-on baby planning mode.  This time around I don't have to worry about things like creating a baby registry, finding a daycare that costs less than our rent payment (which did not exist until we moved), or finding a new job.  All I have to think about it is how scary having a girl will be and if my belly size will ever surpass Owen's (not counting on it).  I also get to decorate our third bedroom.

If you know me, you know that I will not go "all out" on my baby's room.  I do not paint patterns on walls or go crazy with themes.  I do not do Pinterest.  Owen's room had a very subtle dinosaur theme, but the focal point in his room was the art that our family and friends created just for him.


We want to do something similar for Ada, but decided to do all the projects ourselves and keep it to a very general "animal theme," which was inspired by a pig that I made in junior high shop class (I got a 99/100).  


We decided to create three additional pieces that would have different textures and a variety of animals (we wanted to avoid getting stuck in a general "barnyard" or "safari" theme).  The pig is obviously smooth and hard, so my first inclination was to go opposite and think of ways to do something soft and fluffy, which led me to foam and fabric.  I searched the internet for some inspiration and came across this video.  I thought I could do a similar piece in an animal shape.

The Quilted Llama
I selected a llama as my first project because I love them.  When we hit the lottery, I will own a farm and have a herd of llamas.  They are great animals and are good with children, but you need more than one to keep them happy as they are herd-dependent.  I know this because I Googled it.  Naturally, I want Ada to be comfortable with them and thought this was the perfect way to introduce her.  

Items Needed/Total Cost (items that cost $0 were things I already had):
Cardstock - $0
Regular Density Foam 2" x 15" x 17" - $6 (found in upholstery section, on sale for 50% off)
Sharpie or other marker to draw on foam - $0
Bread Knife or Electric Kitchen Knife - $0
Ruler - $0
Fabric Pieces: $0
Fabric Glue: $3
Foam Board: $1.80
Total Cost: $10.80

Step 1: I found some llama silhouettes to create a stencil.  Since I would be cutting the llama out of foam, I wanted to make sure I could draw one that was recognizable without needing too much detail.  I drew my llama on extra cardstock I had lying around and cut it out.


Step 2:  I traced the llama onto a 2" thick piece of upholstery foam I found at Joann Fabrics with a Sharpie.  Using a bread knife, I cut the llama shape out of the foam.  Some online forums said next to a legit foam cutter, an electric knife is the best tool, so I recommend this if you have one.  The bread knife will work fine if you don't.  Don't worry about having some rough edges, as it will be covered up with fabric.  I found that starting the cut was the hardest part, so try to cut as much at one time as possible.  The hardest part was keeping the knife straight up and down to get a good 90 degree angle.

Step 3: Draw and cut the square pattern on to your llama.  I drew 3" x 3" squares, but you can do whatever size you want.  Try to place your squares so you can avoid having too many odd shapes around the edges that will be hard to cover.  Cutting the straight lines with my bread knife was very easy.  I eyeballed the depth of the cut based on the size of my knife.  You should go about halfway through the foam.  This should be enough so the tucked fabric is hidden, but not so much that it feels like it's going to fall apart.


Step 4: Gather your fabric and start covering.  I recommend having an idea of the pattern/placement of your fabric, if possible.  I did not have a plan going into it, so I had to do a lot of re-cutting and replacing because I didn't like the way my fabrics looked together.  You can combine the squares to make it look less uniform and to help with the smaller triangles that ended up around the edges.  For fabric, I used some old t-shirts to give it a personalized look and filled in the rest with scraps that I scored from the Family and Consumer Science teacher who works with my mom.  


Step 5: Once you have all the pieces placed, start gluing the edges.  Wrap the fabric around the shape like a present, being careful to cover all the foam.  I recommend using a tee-shirt or other type of "giving" fabric when doing the more difficult edges, like the ears, feet and butt.  Also, try to do the more difficult areas first.  The fabric glue I used was not very forgiving and it got really messy when I tried to adjust a fold after I had already glued it.  Doing the more difficult areas first will give you more room to mess up so you don't accidentally get glue all over the completed portions of your llama.

Step 6: To hang: Trace another llama onto foam board and glue it onto the back of your foam for support.  We cut two pieces from a wire hanger (about 2" long) and wrapped it with hanging wire.  We poked holes where we wanted the wire to come through and hid the hanger pieces between the fabrics.  The wire went through the foam and the board backing. It's pretty sturdy and the hanger pieces will keep the wire from tearing the foam.  There is probably a better/more professional way to do this, but we like to MacGyver things up at the Silletto household and this seems like it will work.


And now Ada has a quilted llama for her room!  Not to be confused with a llama wearing a quilt.  If I did this again, I may select an easier animal - perhaps a dolphin or whale - to avoid the very tricky legs and ears.


Enjoy!
********
Does anyone have any other ideas for soft wall hangings for a baby's room?  Most of the ideas I found online were small quilts, but I'm not sure I could pull off a quilting project.

Tuesday, January 21, 2014

Top 4 Reasons Why I Run

The past few months, I have spent a lot of time thinking "I should really get outside and run some."  The past few months, I have spent very little time actually running.

It's been about a year since I have been on a regular running schedule.  Most of that has to do with Owen - I would much rather stay home and play with him than go outside in the [fill in unsatisfactory weather here].  When we lived in the Boston area, I never felt like I had enough time with him.  We would wake up at the crack of dawn, drive almost an hour to get to the parking garage that was about 9 miles from our apartment, then get home after 6:30 and deal with dinner and bedtime.  I had roughly 3 hours a day during the week to enjoy him.  It wasn't enough and I couldn't bring myself to take 10-30 minutes out of that to go for a run.  Now that we live in Indiana, we have a much nicer balance.  Our mornings are less hectic and our evenings are much longer.  I would not feel guilty going for a short run every now and then.  My problem now is that there are so few places to run.  Sidewalks in Newburgh only exist in neighborhoods.  You either need to drive somewhere to run (which seems ridiculous), run the same mile route over and over and over until you die from boredom, or take your life in your hands and run on the shoulder of some precarious roads.  Put a little polar vortex sauce on top and this is a recipe for zero motivation to run.  While struggling through my first mile in weeks, I tried to list the things that I like about running that might help me get back in the swing of things.  The Oatmeal's list is also very inspiring.  Complete with Kraken slaying.

1.  Running is free.  You can go out and buy expensive running shoes, compression shorts, iPod arm bands, and all sorts of other gear to make running more pleasant/comfortable.  I have been lost in City Sports many times gently caressing the fancy running tights that promise to keep me warm, wick moisture, stabilize, and so on.  But, really, you could also go out there and look like my favorite never-nude:
http://www.tobiasfunke.com/tag/never-nude
There may be some chafing and people might point and stare but the point is you can run in whatever you want.  I don't like the perception that you have to have to have a (large) disposable income in order to exercise.  Crossfit and gym memberships are great if you can afford it, but I think we need to portray exercise and health living as something that can be done with all budgets.  While running isn't always "a favorite" for people, it's great exercise that doesn't have to break the bank.

2.  Running makes me feel better.  We all have days where we feel groggy or lazy or slow.  Running gives me more energy.  I never feel better about running before I run because I have to dress myself, which is hugely inconvenient.  But once I'm out there, I feel good.  Adrenaline is pumping and I'm happy to be staring at something other than a computer screen.  After running, I am usually in a better mood.


There's lots of science that goes in to explaining all of this, but I'm okay with just saying that running makes me feel better.  Unless I'm running on a treadmill.  Then I hate it.

3.  Running gets me outside.  I love to be outdoors, but sometimes it's hard to get myself off my butt to go outside.  Being a former mass transit user, I was guaranteed at least some time outside every day.  We lived a half mile from a T station, so if nothing else, I got a half mile walk any time I wanted to go somewhere.


Now, the only time I'm required to get outside is when I run an errand and have to walk through the parking lot to get to the store.  Especially now that I work from home.  I could feasibly spend multiple days in a row without ever stepping foot outside (this has happened).


4.  There is no number 4.  I just like even numbers.

Hopefully this list will help.  You know what I know will help?  40+ degree weather.  Have I mentioned I don't like winter?


Friday, July 19, 2013

My first official 5K...and other firsts of Owen's

I finally ran my first official 5K since Owen has been born.  It was a Thursday night event, on a flat course through a park.  And I was able to make it happen in what I consider a "reasonable" amount of time. Success!  And then it rained...for almost four weeks straight and now it's pushing 100 degrees outside. Not my kind of running weather.

So instead, I think we should focus on some exciting firsts of Owen's.  He's got his first teeth and more coming.  He's learned to spit and blow raspberries, which was cute at first but between the active spitting and the accidental drooling his shirts are usually pretty soaked.  And just recently, he showed us that he can crawl for real, but it only lasts a few steps.  But he's an amazing army crawler.  Sometimes it takes a lot of effort, but he makes it to his destination with the perfect mixture of determination and brute force.  When he was first learning, he gained his strength by screaming - much like a female arm wrestler.


The only difference between him and the arm wrestler is that he actually succeeded...

Tuesday, May 7, 2013

Running and Eating - my two favorite things

Owen is a champion runner.  We're starting slow, but our little family brigade is up to 3 miles and counting.  'Tis the season for races and we are ready to start signing up.


All Owen needs is a "Boston Strong" onesie and he will look legit.  

When we're not on the streets running, our lives revolve around eating.  I am fighting off cravings of Wendy's chicken nuggets and Chipotle burrito bowls and we're introducing Owen to fun solid foods.  Rice cereal has been a breeze, but some of the other foods have been a challenge.  Owen loved carrots but carrots did not love him (or his outfits).


And he was NOT a fan of cream of wheat...


But if you're looking for some asparagus, it's that-a-way.


With all this training, this kid's got to get on a runner's diet.  Next we'll try squash and then maybe some sweet potatoes.

Saturday, April 20, 2013

Back in the Roundabout

I haven't been running much lately, but don't worry, I have been very busy.  Instead of running, I had a baby!  Yes, I know you can run and have babies (not at the same time, but you know what I mean) but it just hasn't worked out that way.  Maybe a little, but not really.  I ran last year through some of the pregnancy, but it was exhausting and not that much fun so I stopped.  The dogs and I walked while Micah learned to love running alone and with his headphones.

Once Owen was born, I tried to get out there and run but I was a) recovering from giving birth and b) not willing to battle out the ridiculous blizzards we had in January and February.  Instead, I enjoyed all of the firsts that mothers get to enjoy with a newborn, like...

rolling over from the belly to the back (first time on January 21, 2013),

laughing (first time January 19, 2013 - this video shot a few weeks later),

rolling back over from back to belly (first time March 19, 2013),

finding the humor in scary music,

learning to love raspberries,

being dedicated at REUNION church (March 17, 2013),

trying a first bite of rice cereal (which he learned to love...later),


and much, much more.  The first five and half months of Owen's life has been a fantastic blur.  I can't wait to see what else is in store for us.  And now that the weather is better and Owen is old enough to actually enjoy his BOB stroller, we will start running together.  Our family of three will soon be training for a marathon (not sure which) but this spring we'll stick with 5Ks and 10Ks to get back on our feet.

Sunday, December 11, 2011

I Been Here For Years

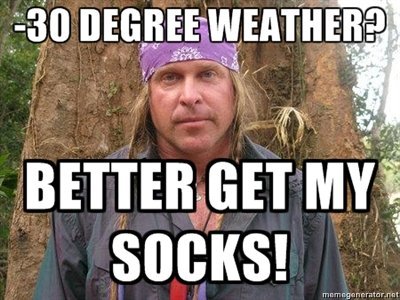
My 64 days and (roughly) 8 hours of no running stretch finally came to an end this morning with the Winter Classic 5K in Cambridge.  Except I didn't run a 5K...I ran approximately 3 miles.  Despite leaving a full hour before the start of the race to get to Central Square which typically takes about 20-30 minutes to get to by the T we got there so late that we had to jump into the race with no bibs and without making it to the starting line.  We jumped in right behind the trailing police car...this was a come back race for Erin, Robbie, and I so we weren't really worried about the technicalities.  But we were able to run the entire course less the section we skipped.  And minus having to stop a couple times to put Robbie's mittens back on.  Oh, and to pick up the shoes and socks he threw off his feet.  Did I mention it was around 30 degrees out while we were running?  Not sure what you're supposed to do with a kid who is crying because he's cold while he is taking his second sock off.  I think he may need to catch up on some Dual Survival because after the crying I saw today, Cody Lundin would not be impressed.
tumblr_lntiv4t5xd1qgghixo1_400.jpg
The ankle didn't hurt when running, but there was definitely some achiness after the race.  Not so much a throbbing pain or anything that even remotely resembled the original injury but a very subtle radiating pain that would slowly fade in and out every once in awhile.  My ankle is elevated as I speak type, but I think I may slowly be getting back in the game.  But don't call it a come back 'cause, well, you know...